KeenTools FaceBuilder x MetaHuman Guide
KeenTools FaceBuilder x MetaHuman 指南
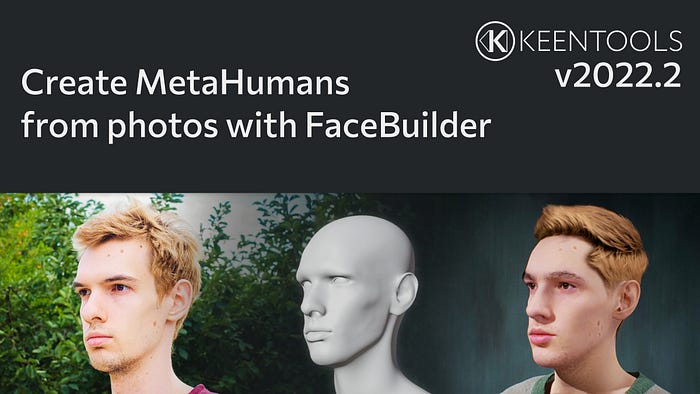
In this guide, we will explain how our FaceBuilder plugin can help to create MetaHumans out of photos of real people. If you’ve never used FaceBuilder before, you can check the FaceBuilder for Blender written guide, watch our detailed livestream or find any other tutorial on YouTube to get accustomed to the basics.
在本指南中,我們將解釋 FaceBuilder 插件如何幫助根據真人照片創建元人類。如果您以前從未使用過 FaceBuilder,您可以查看 FaceBuilder for Blender 書面指南、觀看我們詳細的直播或在 YouTube 上查找任何其他教程來習慣基礎知識。
FaceBuilder: Creating a head model
FaceBuilder:創建頭部模型
First, let’s download and install FaceBuilder for Blender. Once it’s done, create a FaceBuilder head and load some photos. You can see them in the stack on the right tab.
首先,讓我們下載並安裝適用於 Blender 的 FaceBuilder。完成後,創建一個 FaceBuilder 頭部並加載一些照片。您可以在右側選項卡的堆疊中看到它們。
Now you can start the process we in KeenTools call “Pinning”: click one of the buttons with an image file name on the Views panel — you will switch the Pin mode on. In the viewport, you’ll see the photo you loaded and the mesh of the FaceBuilder 3D model. Now you can start pinning the mesh to the photo.
現在您可以開始我們在 KeenTools 中稱為「固定」的過程:點擊 Views 面板上帶有圖像檔案名稱的按鈕之一 - 您將開啟固定模式。在視口中,您將看到載入的照片和 FaceBuilder 3D 模型的網格。現在您可以開始將網格固定到照片上。
It can be done manually or using automatic face alignment. For the second option, press the Align Face button on the Views panel. Then a couple of neural networks will find a face on the photo and set up some pins to match the position and the shape based on facial landmarks. It doesn’t work 100% accurately but it definitely allows you to start building your model faster.
它可以手動完成或使用自動面部對齊來完成。對於第二個選項,請按下 Views 面板上的 Align Face 按鈕。然後,幾個神經網路將在照片上找到一張臉,並根據臉部標誌設定一些引腳來匹配位置和形狀。它不能 100% 準確地工作,但它絕對可以讓您更快地開始建立模型。
The pinning process is iterative and we recommend starting with approximate positions across all of the views first. This looseness of positioning allows FaceBuilder to estimate camera positions without diving too deep into the details of the shape.
固定過程是迭代的,我們建議先從所有視圖的大致位置開始。這種鬆散的定位使得 FaceBuilder 能夠估計相機位置,而無需深入研究形狀的細節。
Once you’ve done with the approximate pinning, it’s time to start adjusting the shape adding more details on different views one by one going back and forth until you’re satisfied with the result.
完成近似固定後,您可以開始調整形狀,在不同視圖上一一添加更多細節,直到您對結果感到滿意為止。
It usually takes up to 30 minutes to get a really detailed 3D model.
通常需要長達 30 分鐘才能獲得真正詳細的 3D 模型。
Exporting a texture and model
匯出紋理和模型
Once the head and face are pinned across the desired number of views, FaceBuilder can create the texture — open the Texture tab, select the mh UV map and set the size to 1024 x 1024 pixels, then it will match the default MetaHuman texture.
一旦頭部和臉部固定在所需數量的視圖上,FaceBuilder 就可以建立紋理 - 打開 Texture 選項卡,選擇 mh UV 貼圖並將尺寸設為 1024 x 1024像素,那麼它將匹配預設的MetaHuman 紋理。
Click the Create texturebutton and once the texture is ready, you can export it in a file or work with it inside Blender. Let’s export it because you’ll need it later for our MetaHuman.
點擊 Create texture 按鈕,紋理準備好後,您可以將其匯出到檔案或在 Blender 中使用它。讓我們導出它,因為稍後您將需要它來用於我們的 MetaHuman。
Apart from that, you also need to also to export the model as an FBX file which you will load to Unreal Engine.
除此之外,您還需要將模型匯出為 FBX 文件,然後將其載入到虛幻引擎中。
Mesh to MetaHuman: Aligning the model
Mesh 到 MetaHuman:對齊模型
Here we come to Unreal. First, let’s import the model using the exported FBX file with its texture saved as a PNG file. Then, please check you have the Mesh to MetaHuman plugin installed and activated.
我們來到了虛幻。首先,我們使用匯出的 FBX 檔案匯入模型,並將其紋理儲存為 PNG 檔案。然後,請檢查您是否已安裝並啟用 Mesh to MetaHuman 外掛程式。
Create a MetaHuman asset, call it as you wish and select the imported FBX file as a base model. Here it’s better to narrow the view angle, so it won’t be so wide and the face will be less distorted. Then we frame the face to see the frontal view with all its details and launch auto-tracking, which takes a couple of moments and gives us the automatically detected facial landmarks.
建立一個 MetaHuman 資源,根據需要呼叫它並選擇導入的 FBX 檔案作為基礎模型。這裡最好把視角縮小一點,這樣就不會那麼寬,臉也不會那麼扭曲。然後,我們對臉部進行取景以查看正面視圖及其所有細節,並啟動自動跟踪,這需要一些時間,並為我們提供自動檢測到的臉部標誌。
Lock the camera and check if the landmarks are good enough. Once you’re sure that everything looks good, launch the Identity Solve button. This function uses the landmarks to produce a MetaHuman model based on the imported FaceBuilder mesh. Now you’ve got your model wrapped with a MetaHuman topology!
鎖定相機並檢查地標是否足夠好。一旦您確定一切看起來都不錯,請啟動 Identity Solve 按鈕。此函數使用地標根據匯入的 FaceBuilder 網格產生 MetaHuman 模型。現在您已經用 MetaHuman 拓樸封裝了模型!
將 Mesh 中的模型與 MetaHuman 對齊
If after comparing the imported FaceBuilder mesh with the solved MetaHuman model you notice that some parts of the face aren’t perfect. It’s easy to fix. In this case, frame the head to see the inaccurate part better, launch auto-tracking once again, switch on the landmarks of this part and fix them, so they accurately reflect the geometry. Launch the Identity Solve button one more time to get a new MetaHuman model.
如果在將匯入的 FaceBuilder 網格與已求解的 MetaHuman 模型進行比較後,您發現臉部的某些部分並不完美。這很容易修復。在這種情況下,對頭部進行框架以便更好地看到不準確的部分,再次啟動自動跟踪,打開該部分的標誌並修復它們,使其準確地反映幾何形狀。再次啟動 Identity Solve 按鈕即可獲得新的 MetaHuman 模型。
When you’re satisfied with the results, choose a body from the list on the left, and click the Mesh to MetaHumanbutton to upload it to the MetaHuman online backend for further modification.
當您對結果感到滿意時,從左側清單中選擇一個正文,然後按一下 Mesh to MetaHuman 按鈕將其上傳到MetaHuman線上後端進行進一步修改。
MetaHuman Creator: set up the appearance of the character
MetaHuman Creator:設定角色的外觀
In the online MetaHuman editor, choose the character and tune it to match the person from the photos as closely as possible by tweaking the skin colour, eyes, facial hair, clothes and so on.
在線上 MetaHuman 編輯器中,選擇角色並透過調整膚色、眼睛、臉部毛髮、衣服等將其調整為盡可能匹配照片中的人物。
設定外觀
Using the online editor, you can reach a very good level of likeness, but there’s a way to make it even better. To achieve this we need to replace the generated MetaHuman texture with something more realistic and feature-rich.
使用線上編輯器,您可以達到非常好的相似度,但有一種方法可以讓它變得更好。為了實現這一點,我們需要用更真實且功能豐富的東西來替換生成的 MetaHuman 紋理。
Photoshop: Preparing the texture for MetaHuman
Photoshop:為 MetaHuman 準備紋理
MetaHuman uses four textures for different facial expressions including the neutral one. We take them all to Photoshop and merge with the mh texture previously extracted from the photos by FaceBuilder.
MetaHuman 針對不同的臉部表情使用四種紋理,包括中性紋理。我們將它們全部帶到 Photoshop 中,並與先前由 FaceBuilder 從照片中提取的 mh 紋理合併。
The mh texture map of FaceBuilder was created specifically to make this process as simple as possible. It matches the layout of the built-in MetaHuman texture perfectly, so all facial parts will align naturally, you just need to set up the size of the texture properly as we did while creating and exporting the texture.
FaceBuilder 的 mh 紋理貼圖是專門為使此過程盡可能簡單而創建的。它與內建 MetaHuman 紋理的佈局完美匹配,因此所有臉部部位都會自然對齊,您只需要像我們在創建和導出紋理時一樣正確設置紋理的大小。
At this stage, you need to accurately join high and low-frequency details from both textures and match their colours. Don’t forget to also clean up the standard MetaHuman texture from the features that it has, but your real person hasn’t.
在此階段,您需要準確地連接兩個紋理的高頻和低頻細節並匹配它們的顏色。不要忘記還清理標準 MetaHuman 紋理所具有的功能,但你的真人卻沒有。
將 FaceBuilder 中的 mh 紋理與 MetaHuman 紋理合併
Unreal Engine: adding the new textures
虛幻引擎:添加新紋理
In Unreal, let’s create a sample MetaHuman project and import back the character we tweaked in the online MetaHuman editor. Replace the default character in the scene with your MetaHuman.
在 Unreal 中,我們建立一個範例 MetaHuman 專案並匯入回我們在線上 MetaHuman 編輯器中調整的角色。將場景中的預設角色替換為您的超人類。
The final step — you need to replace the textures of the model with the ones you created earlier in Photoshop out of the MetaHuman ones and the ones extracted from the photos by FaceBuilder. Do it one by one for every expression.
最後一步 - 您需要將模型的紋理替換為先前在 Photoshop 中建立的 MetaHuman 紋理以及 FaceBuilder 從照片中提取的紋理。對每個表情都一一進行。
Once you’ve completed it, you will see the distinct skin features of the person on the MetaHuman character!
完成後,您將看到 MetaHuman 角色上人物的獨特皮膚特徵!
具有來自 FaceBuilder 的 mh 紋理的 MetaHuman 模型
That’s it! 就是這樣!
In the short future, we will release a detailed video guide covering this process. Subscribe to our YouTube channel to not miss it!
在不久的將來,我們將發布涵蓋此過程的詳細影片指南。訂閱我們的 YouTube 頻道不要錯過!
Download FaceBuilder for Blender 2022.2 from our website.
從我們的網站下載 FaceBuilder for Blender 2022.2。
Follow us: Facebook, Linkedin, Twitter, Instagram, YouTube, Discord, Reddit
關注我們:Facebook、Linkedin、Twitter、Instagram、YouTube、Discord、Reddit